ADO Builder Use Case Building
Introduction
In this tutorial, we will be going through all the steps of building an Andromeda App from scratch using the ADO builder. If you are not familiar with the ADO Builder, we have a complete section on it providing an overview of what it does and the different options the ADO Builder offers. We will be choosing a specific use case to build from scratch using the ADO Builder to get you started on your journey.
Defining Our App
First thing we need to do is choose the app we would like to build. For this guide, we will be building an Auction App that allows users to sell their NFTs in an auction. We will assume the auction has a tax fee of 10% on sales, which we can add using specific modules (A royalty can be used instead of a tax fee, but we use tax fee in this example).
Note: The Auction App is also found as one of the pre-built and ready to use templates. In our case below, we will showcase how to create from scratch as opposed to selecting the pre-built template.
Building the App
To get started in building the app, we go to the ADO Builder page and select Get Started to open a new blank canvas:

Make sure to select the chain you are looking to deploy on. For this example, I have chosen to use the JUNO testnet to deploy on.
Note: You can choose any of the chains for this tutorial, but make sure to use the correct wallet addresses for each chain.
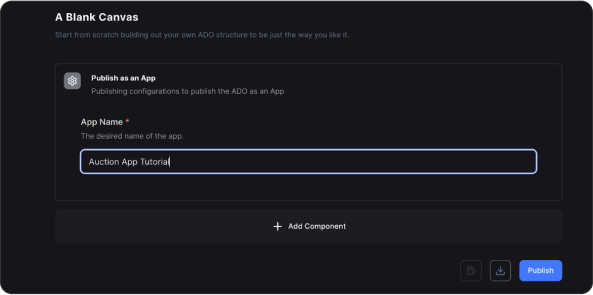
Once we click on Get Started, we will be taken to the blank canvas page. We will begin by selecting a name for the app:
Next, we need to start adding some ADOs/Components to our app. To do so, we need to make sure we know what ADOs are needed. For our Auctioning App, the three main components we will need are:
- CW721 ADO - to mint the NFTs
- Auction ADO - to auction the NFTs
- Rates ADO - to add taxes (or royalties) to the auction and apply to NFTs
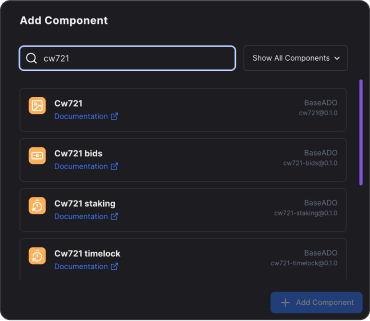
Now, we will begin adding and configuring the CW721 component. Select Add Component and then search for the CW721 ADO :
The component panel will load, and we can start configuring it. First thing to do when a new component is added is to pick an appropriate name. We have used “NFT” as our name below.

Click the pencil icon and type the name you would like to give the component:

Note: The assigned name of the component can be used to reference that component in the app.
Now, we will configure the CW721 component by completing the mandatory (and optional if so desired):
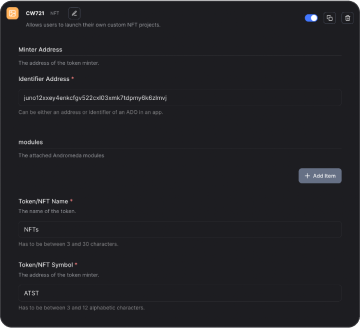
As you can see above, we have given our NFT collection a name, a symbol, and we have defined the minter, which is the address that needs to be connected to the web-app to mint NFTs.
For this example, we will use our connected address as the minter, so just copy the address from the top right (or use your own) and paste it into the panel.
Next, it is time to add our rates component to the app. This component will be responsible for setting up the taxes for the auction. Search or Select the rates component to the app and then click on Add Item:

Don’t forget to change the name to something relevant to our App. We will name this component “Rates”.
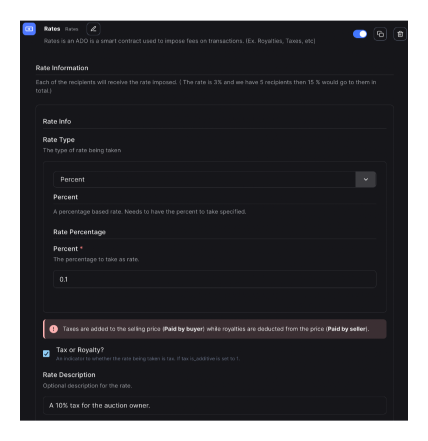
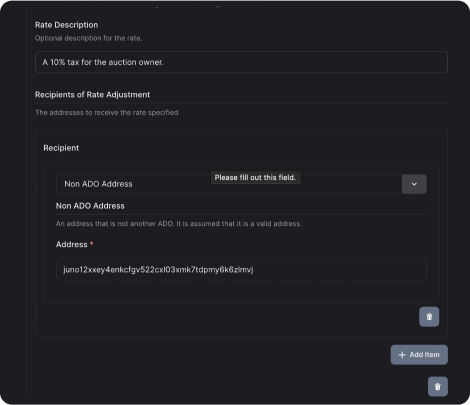
We also want to include a 10% tax on each NFT sale in the auction. Change the Rate Type from Flat to Percent and under Rate Percentage we input 0.1 meaning 10%. We can also include a small description about the tax. Make sure to click the checkbox under the Tax or Royalty section to specify that the rate is a tax.
Finally, we need to specify the address to receive payment of this tax. We want the funds to go to a wallet address and not an ADO. Again, we will be using the same address as our connected wallet (although you can specify any address you want):
The last piece of the puzzle for our App is the Auction component. Add an Auction component to the app. Since we want to attach taxes to the auction. we need to add a rates module. We select Add Item under Selected Modules section:

We get the option to add a module. As we have mentioned before, the components can be referenced by name. Under the Identifier section, we input the name of our rates components which is Rates (Based on what we changed it to before) in this case. Also, for the Module Type section we can specify rates as the type:
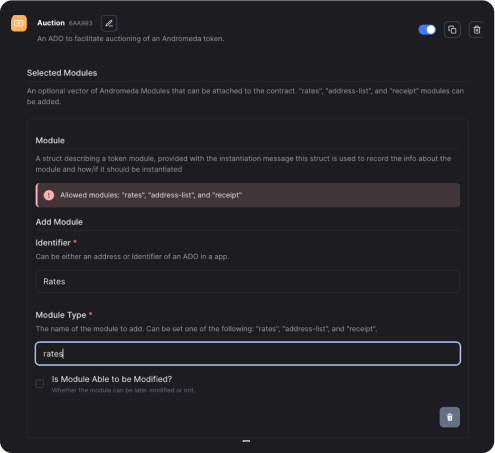
Note: At the bottom of the panel we can specify if the module can be modified later on. This means it can be removed or changed at a later date depending upon the purpose of your project/goals.
Publishing the App
Great work so far. Our app is now ready to be published to the chain. If you want to save the build for later on, or share it, you can export it before publishing by clicking the download button next to the publish button:

Great work so far. Our app is now ready to be published to the chain. If you want to save the build for later on, or share it, you can export it before publishing by clicking the download button next to the publish button:
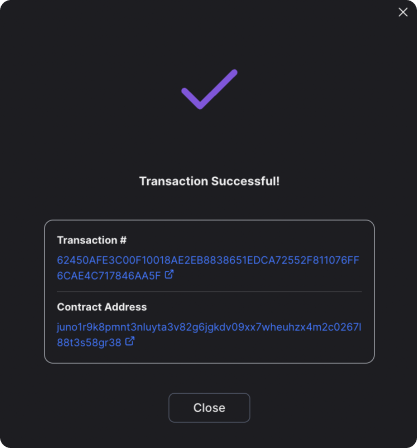
Congratulations!! You have built your first Andromeda App. To get information on the App and interact with it, you can visit the assets page where it will be listed.
